ASPA
  • Home
  • Online Classes
  • Join ASPA
  • Get Certified
  • Videos
  • Store
  • Equipment & Supplies
Picture

Lining up an Image on a T-Shirt for Screen Printing

12/17/2019

0 Comments

 
Picture
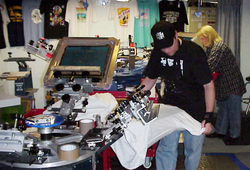
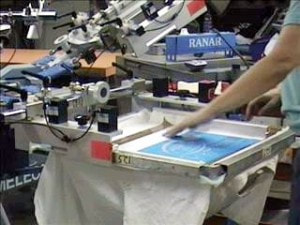
An important aspect of screen printing a T-Shirt properly is getting the print straight on the shirt. A print that is not square and runs up or down hill will surely end up in the rag pile.

Once you line up the screen to the image to be printed, you should be ready to print a full run of shirts without the screen moving. 

Then it is as simple as putting each shirt on the platen in the same place to get a consistent placement of the image.


Setting a standard measurement to use is a good rule of thumb. We’ll use the bottom of the shirt collar as a starting point to measure from. As an example, we’ll place an image on the front of the shirt “3 inches from the bottom of the collar”. This means we have measured and placed the top of the image to be printed 3” below the collar. We will tape the film positive in place and use it to line up the screen. Now that you have a shirt placed on the platen properly and have determined where the image will be placed, we'll demonstrate how to set up the artwork for printing. We are going to cover lining up a single color print job.

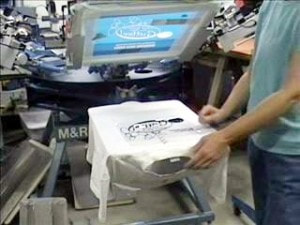
Step 1. Place the film positive artwork on the shirt. Measure 3” from bottom of the collar to the top of the image. Center the art on the shirt. You can center the artwork on the shirt either visually or by measurement.

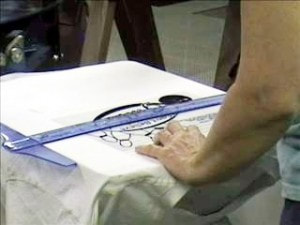
Step 2. Next, place a T-square under the image to make sure the image is square with the shirt. You can obtain a t-square at most office supply stores. An 18-24” t-square works best for setting up jobs on most t-shirt screen printing presses.

Step 3. Tape down the film positive on the shirt with removable tape. Be sure to use several pieces as you do not want the film positive to move once you determined the exact placement.

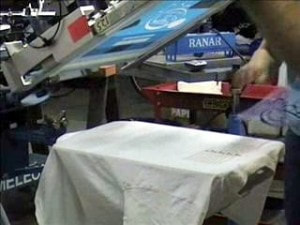
Step 4. Bring the screen head down and place the screen on top of the film positive so that the stencil lines up exactly. Tighten down the knobs of clamps of the print head. Each time you bring the screen down to print, it should print the image in exactly the same place on the shirt.

TIP: Before you print an entire run of shirts, check out the placement by either holding up the shirt and looking at the and looking at the print or try on the shirt and look in a mirror.


0 Comments

Your comment will be posted after it is approved.


Leave a Reply.

    Author

    ASPA Staff

    Archives

    January 2020
    December 2019

    Categories

    All
    All Over Screen Printing
    All Over Tshirt Printing
    Athletic Team Shirts
    Athletic Wear Printing
    Black And White Printing
    Black Light Ink
    Build An Exposure Light
    Building An Exposure Unit
    Burning A Screen
    Burn Screens With LED Light
    Buy A Screen Printing Press
    Buy Screen Printing Equipment
    Capillary Film
    Coating A Screen
    Coating Screens
    Cold Peel Transfers
    Color Change Ink
    Creating A Stencil
    Curing A Print
    Curing Plastisol Ink
    Custom Clothing Labels
    Custom Printed Designer Tags
    Custom Printed Tags For Tshirts
    Custom Tshirt Labels
    Custom Tshirt Tags
    DIY Exposure Unit
    DIY Light Box
    Drying A Screen Printed Shirt
    Emulsion
    Exposing A Screen
    Exposure Lamp
    Exposure Light
    Exposure Light Box
    Exposure Unit
    Ez Expose Exposure Unit
    Flash Back Ink
    Flash Cure Unit
    Flash Curing
    Flash Curing A Dark Shirt
    Flashing A Screen Print
    Flood Stroke
    Fluorescent Ink
    Gel Ink
    Getting A Straight Print On A Tshirt
    Glow In The Dark Ink
    Golf Shirt Printing
    Halftone Screen Printing
    Hat Printing
    Heart Print On A T-shirt
    Heat Sealed Transfers
    Heat Transfers
    Homemade Exposure Unit
    Hooded Sweat Printing
    Hooded Sweatshirt Printing
    Hoodie Sweatshirt Printing
    Hot Split Transfers
    How To Build An Exposure Unit
    How To Print Caps
    How To Print Visors
    How To Screen Print Ball Caps
    How To Use A Scoop Coater
    How To Use A Squeegee
    Inkjet Film Positive
    LED Exposure Unit
    LED Light For Exposure Unit
    LED Lights For Exposing Screens
    LED Screen Printing Light
    Light For Burning Screens
    Light Source For Exposure Unit
    Lining Up A Film Positive
    Lining Up A Screen Print
    Lining Up A Screen To Film
    Making A Screen
    Making A Stencil
    Manual Screen Printing
    Mercury Vapor Exposure Light
    Mesh Count
    Metal Halide Exposure Light
    Metal Halide Light Exposure
    Metallic Ink
    Multi Color Printing On Dark Shirts
    Multi-color Screen Printing
    Name And Numbers
    Neon Ink
    Off-contact Screen Printing
    Pellon Squares
    Placing An Image On A Tshirt
    Plastisol Ink
    Polo Shirt Printing
    Printing On Dark Colored Shirts
    Printing Photographic Images
    Printing Transfers
    Puff Ink
    Purchase Printing Equipment
    Reflective Ink
    Screen Coating
    Screen Exposure
    Screen Hold Down
    Screen Mesh
    Screen Printing
    Screen Printing Grayscale Images
    Screen Printing Hoodies
    Screen Printing Inks
    Screen Printing Names And Numbers
    Screen Printing On Black Shirts
    Screen Printing On The Left Chest
    Screen Printing Sweatpants
    Screen Printing Sweatshirts
    Screen Print Shop Clean-up
    Screen Print Shop Maintenance
    Serigraphy
    Shimmer Ink
    Shims For Off-contact
    Silk Screen
    Silk Screener
    Silk Screening
    Silk Screen Printing
    Special Effects Ink
    Special Effects Plastisol Inks
    Squeegee Angle
    Suede Ink
    Team Shirts
    Test Prints
    T-shirt Left Chest
    Tshirt Printing
    Vellum Paper
    Vellum Paper Film Positive
    Wet On Wet Screen Printing

    RSS Feed

Advice Notice & Disclaimers | Privacy Policy | Terms of Use | Sitemap | Contact Us | About ASPA | Advertise with Us | ASPA Members

Copyright © 2004-2023 American Screen Printing Association Inc. (ASPA) | The #1 Ranked Screen Printing Association on the Web | All Rights Reserved.

  • Home
  • Online Classes
  • Join ASPA
  • Get Certified
  • Videos
  • Store
  • Equipment & Supplies