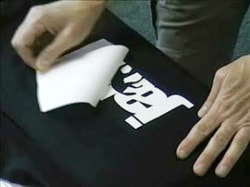
 Custom printed transfers can be another way to add a profit center to your t-shirt printing business. Screen printing transfers (especially single color transfers) is easy and they can be produced very quickly if you have the right equipment. Many shops started printing transfers as a side line and developed into transfer specialists producing only custom transfers exclusively because of the high profit factor. Another great feature of custom transfers is for servicing repeat customers who have small orders. By printing extra transfers of the customer's art, you can save the transfers for their next order. And without having to burn new screens, you can fill the next order easily and quickly. Custom transfers are also useful for printing some hard to print substrates such as ball caps, jackets, bags etc. Think of printing custom transfers as a license to print money. Printing a sheet of paper with a tiny amount of ink at a cost of a penny or less and turning it into something that sells for dollars is a great way to make money! TYPES OF TRANSFERS: HOT SPLIT and COLD PEEL TRANSFERS What's the difference between a Hot Split and a Cold Peel transfer? Hot Split Transfer: A plastisol ink transfer where the transfer paper is removed within a few seconds of application. The ink then “splits” leaving a portion of ink on the garment and a portion on the paper. Hot splits transfers are typically used on light colored garments and have a soft hand. Cold Peel Transfer: A plastisol ink transfer where the transfer paper is not removed until the print has completely cooled; resulting in the entire ink deposit being transferred to the garment. 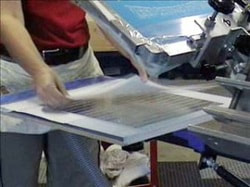 VACUUMS PLATENS AND TABLES The easiest way to print custom transfers is with the use of a vacuum attachment that fits on one of the stations of your screen printing press. A vacuum platen is a specially made platen that has many small holes drilled into its surface in which a vacuum hose is attached to its base. A vacuum platen is typically used for printing transfers, decals, and other light weight paper goods where adhesion by vacuum is more practical than chemical adhesives. A vacuum platen attachment will cost you around $500 and up. f you're the do-it-yourself type, you can also build a homemade vacuum table for around $150. All that you will need is a heavy duty vacuum cleaner or shop vac, a pair of screen clamps (available from any screen print supply vendor), and a decent quality flat bed table. 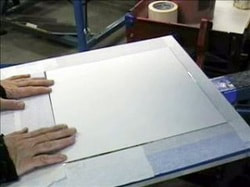 HOW TO PRINT CUSTOM SCREEN PRINTED TRANSFERS The mechanics of printing screen printed transfers is very simple. Place a sheet of transfer paper on the vacuum platen, start the vacuum, lower the screen and print with just one squeegee stroke. Release the vacuum and remove the finished print from the platen and send it through the dryer for partial curing (partial curing process is covered below). Multi-color transfer printing (which is covered below) is essentially a repeat of this entire process for each color until all of the colors have been printed. HOW TO PREPARE ARTWORK When preparing artwork for single color transfers, keep in mind that it is difficult to transfer fine detail. With multi-color transfers this is not a such problem because the details in an image will often be printed over another color or on an underbase. We cover multicolor transfers in a section below. For the remainder of this lesson let us assume that we are printing only single color transfers. You want to limit the amount of detail in the artwork when creating single color transfers because thin lines, halftone dots, and other small elements will deposit a very small amount of ink onto the transfer paper. As a result, some of these tiny elements may not always transfer properly. Moreover, the recommended mesh counts of 60-83 for creating single color transfers often make it difficult to wash out fine lines, halftones etc. as these mesh counts are relatively coarse. It is important to understand that with all transfers, either hot split or cold peel it is necessary to deposit a sufficient amount of ink on the garment to obtain an acceptable transfer print. 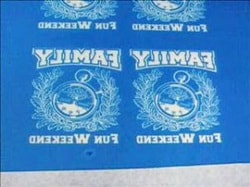 REVERSING THE ART When creating art for custom transfers it is necessary that you reverse the art when making screens so that the transfer will be “wrong reading.” The reason for this of course is that when the transfer is applied to the garment with a heat press it will then become “right reading.” To create a screen for making custom transfers, simply turn the film positive upside down (or face down) before exposing the screen. MESH COUNT SELECTION As previously indicated, for obtaining the best results for single color transfers, we recommend mesh counts of 60-83. You may on some occasions want to go as high as 125 mesh to resolve as much image detail as possible, however be mindful that the ink deposit on the transfer and on the garment will be diminished. INK SELECTION (HOT SPLIT and COLD PEEL) There are specially formulated inks just for the purpose of making custom transfers. These inks are primarily used for the creation of hot split transfers. Cold peel transfers can be made using almost any type of plastisol ink. It is this author's recommendation that you try as many brands as possible of hot split transfer ink, as it has been our experience that they do not all work equally well. Shop around and experiment before you make any large investment when stocking transfer inks for your shop. Regarding inks for cold peel transfers, we recommend that you use a super opaque formulation whenever possible, as this will almost always produce the best print result. Moreover, we suggest you do not reduce inks that will be used for single color transfers so you may achieve the desired opacity and trueness of color. TYPES OF TRANSFER PAPER There are several types of transfer papers on the market. There are papers made that are recommended for hot split and there are papers recommended for cold peel transfers only. There are also transfer papers that are recommended for BOTH hot split and cold peel transfers. In addition, transfer paper is available in many different sizes. Based on our experience, we recommend that when starting out that you purchase just one type of paper from which you can produce both hot split and cold peel transfers. This will save you from having to stock two different types of paper and will eliminate the chance of using the wrong paper for the job. Further, if you stock just one size: for example 15” X 15” paper, this may eliminate the need for stocking multiple sizes of transfer paper. Simply ask your screen printing supply vendor for a “multi-transfer” type of paper that you can use to make both hot split and cold peel transfers. 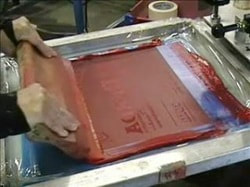 PRINTING TECHNIQUE(S) The most important thing to know about screen printing plastisol transfers is that you print the image with just one stroke. The ideal stroking technique for printing transfers is a normal squeegee angle with a slow and steady stroke with medium to heavy pressure to ensure that you are getting a good ink deposit onto the transfer paper. Multiple strokes may result in an undesirable “shadow printed” image. If you make a mistake and the print is not of the quality you expect, simply discard the misprint and print another transfer. Paper is cheap and it is better to discard marginal prints than to give your customer a bad transfer. Depending on the artwork and the type of ink being used, you may find that a flood stroke is helpful to give you an adequate ink supply over the stencil prior to doing the actual print stroke. The key feature is using a light flood stroke that will only fill the screen with ink and will not produce a print onto the transfer paper. 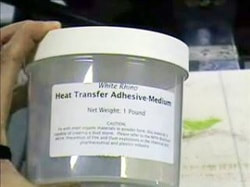 USING POWDERED ADHESIVE ON COLD PEEL TRANSFERS Regardless of the type of ink that you use, cold peel transfers have a tendency to not adhere completely to the garment when the transfer is applied. This problem can become very frustrating and can cause you (or your customer) to needlessly ruin shirts. The problem becomes most apparent with small elements in a design, such as small letters, fine lines, or detail around the edges of an image. This is one more reason why you want to limit the amount of detail in a design when planning art for custom transfers. A solution to the transfer adhesion problem of cold peel transfers is to use powder crystal adhesive. Powdered crystal adhesive (available from your screen print supply vendor) is a finely ground adhesive powder that looks like salt. Transfer adhesive powder is usually sold by the pound and available in fine and medium ground versions. It has been this author's experience that the medium ground version works significantly better and does not wind up on everything like the fine ground powder does. 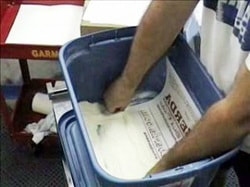 Once a cold peel transfer has been printed, the transfer powder is applied to the not yet cured (wet ink) transfer. One easy way to apply powder adhesive is to use a small plastic storage box (available in most stores) and dump a pound of adhesive powder in the box. Coat each transfer by dragging it through the powder making sure the entire transfer gets covered with the adhesive. Shake off any loose powder from the paper back into the box, as this will help reduce the build up of unwanted adhesive powder on your dryer belt (and everything else). The transfer is now sent through the dryer for the partial cure. Applying custom transfers to ball caps can become a notoriously difficult task, especially when using cold peel transfers. Some ball cap materials make adhesion difficult and we strongly recommend that you always apply adhesive powder to any cold peel transfers that will be used for ball cap printing. 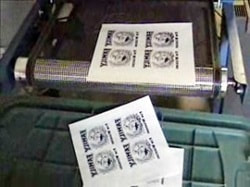 HOW TO “SEMI” CURE THE TRANSFERS It is important to understand that you do not want to fully cure the ink on your transfers when sending them through the dryer. The ink must be only partially cured so when it is remelted during the heat transfer process it will adhere to the garment. You do not want the transfer to go beyond a temperature of around 210 degrees for a partial cure. The easiest way to achieve a partial cure of the transfers is to speed up the dryer belt. Using a heat gun, measure the temperature on the transfers as they come out of the chamber. Once you have measured the optimum temperature for partially cured transfers on your dyer take note of the belt speed on your dryer and use that setting for all future transfer printing. To be sure your transfers are partially cured properly, we recommend that you do some test transfers onto test rags with your heat transfer press to ensure that all is well. It is always a good idea to periodically perform actual transfer print tests to make sure your transfers are working properly. HOW TO PRINT MULTI-COLOR TRANSFERS Printing multi-color transfers can be very profitable, however the printing requires several more steps than single color transfer printing and is significantly more time consuming. The key feature of printing multicolor transfers is that each color will need to be printed and semi cured through the dryer before printing the next color. The amount of time each transfer spends in the dryer is extremely important as you do not want to over-cure the transfer as it will not transfer properly if it is over-cured. Each trip through the dryer adds a certain amount of curing time. The first step in producing multicolor transfers is to send the transfer paper through the dryer before printing to “pre shrink” the paper. This is necessary because without the pre-shrinking of the paper you will have registration problems when printing the additional print colors. Next, line up the screens of your individual print colors on your press in a reverse order of what you would use for direct printing. For example, if you have a three color image consisting of white, red and black ink, print black first, then red, then white. You always want to print the outline or darkest color first because that will be the top color of the image when the transfer is applied to the garment. You can still use your regular choking and trapping of the artwork to achieve proper registration of a design. It is important that each color register as perfectly as possible. An easy way to do this is to use a simple three point registration system. On your vacuum platen, simply tape down two small, thin pieces of cardboard at the back and one on the side. The cardboard will act as a “stop” for the transfer paper allowing you to place it in the same position each and every time. Once you have all your print colors set up and registered on the press, you can begin the actual printing. As previously indicated, print the black screen first and send it through the dryer for its partial curing. Next, place the sheet back on the vacuum table to print the red ink and once again send it through the dryer for its partial curing. Lastly, line up the transfer one more time on the vacuum platen and print the white ink. Send the transfer through the dryer one last time. Congratulations, you have just printed a three color transfer! DO A TEST APPLICATION OF YOUR TRANSFERS Upon completion of your print run, we strongly recommend that you turn on your heat press and do some sample applications of your newly printed transfers to make sure they work properly. In fact, it is a good idea to do test prints as a matter of course for all multi-color transfer print runs if possible. OUTSOURCING TRANSFERS If you plan to use multicolor transfers in your shop for your own customers, you will find that there are numerous screen printers who specialize in creating them. It is often more cost effective and time efficient to outsource multi-color transfers than printing them yourself. You will find a list of transfer-only printers in the ASPA Equipment and Resources Directory. APPLICATION INSTRUCTIONS FOR THE CUSTOMER If you are selling custom transfers to the public, you will want to provide an application instruction sheet so they will know how to apply the transfers. Create a separate application sheet for cold peel and hot split transfers and be sure to put one in the box in which the transfers are shipped. A typical application instruction sheet should include the heat press settings including the press temperature, pressure, and application dwell time. PACKING THE TRANSFERS Because transfers are only partially cured, the ink is delicate and the transfers must be handled carefully. This is especially important when packing and shipping transfers to your customers. After the transfers have cooled, stack them carefully and place them in a plastic bag to protect them during shipment. Be sure to use a shipping box or package that does not have a lot of excess room for the transfers to move around. SAVE A SAMPLE OF EVERY TRANSFER It's a good idea to always keep at least one sample transfer from every print run. Many times customers who purchase transfers are inexperienced and will try to blame your transfers for problems that are really the result of their improper application technique or incorrect settings on their heat press. Often enough, it is a simple issue of not using the right temperature, pressure or time settings for their heat press. By keeping a test print for every transfer, you can apply their transfer in your shop to see if there is a real problem with the transfers you made or if the problem lies with the customers application.
0 Comments
Your comment will be posted after it is approved.
Leave a Reply. |
AuthorASPA Staff ArchivesCategories
All
|
Copyright © 2004-2024 American Screen Printing Association Inc. (ASPA) | The #1 Ranked Screen Printing Association on the Web | All Rights Reserved.


 RSS Feed