

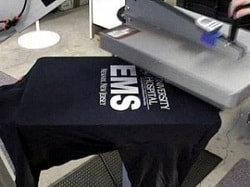
 This tutorial is limited to curing plastisol ink only. IS IT “DRIED” OR “CURED?” The last step in the screen printing process is the curing of the print. Plastisol ink must reach a temperature of 320 degrees to be considered “fully cured.” Although it would seem natural to use the term “dried,” it would be a misnomer as the ink film on a product may feel “dry” to the touch, but not be fully cured throughout the entire ink deposit. The print surface may seem “dry,” but the inner portion of the ink film may not be. A print that is not fully cured will not stand up to a washing. The ink will come off during the washing cycle as the ink was only “gelled” and not thoroughly cured. You can be sure that if the order of shirts that you sent out did not cure properly, you will found out the hard way by having the order returned to you. To avoid having your customer do your “cure tests” for you, we will offer some solutions to help ensure that all of the products that leave your shop are fully cured. WAYS TO CURE A PRINT USING A FLASH CURE UNIT If you start off your shop on a small budget, you may be able to only afford a flash cure unit to completely cure your shirts. This author started a screen printing shop with just a flash cure unit, so I can give you first hand advice that it can be done. In fact, a textile dryer (the ideal method for curing) is essentially nothing more than a belt driven chamber that contains the same type of heating elements that you find in a flash cure unit. Now for the downside... 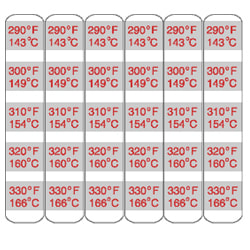 A print that is not fully cured will not stand up to a washing. The ink will come off during the washing cycle as the ink was only “gelled” and not thoroughly cured. You can be sure that if the order of shirts that you sent out did not cure properly, you will found out the hard way by having the order returned to you. To avoid having your customer do your “cure tests” for you, we will offer some solutions to help ensure that all of the products that leave your shop are fully cured. WAYS TO CURE A PRINT USING A FLASH CURE UNIT If you start off your shop on a small budget, you may be able to only afford a flash cure unit to completely cure your shirts. This author started a screen printing shop with just a flash cure unit, so I can give you first hand advice that it can be done. In fact, a textile dryer (the ideal method for curing) is essentially nothing more than a belt driven chamber that contains the same type of heating elements that you find in a flash cure unit. Now for the downside... 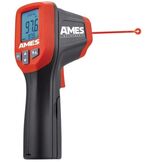 THE “OTHER” HEAT GUN This type of “heat gun” has an entirely different purpose. A heat gun also known by it's fancy name (non contact pyrometer) is a useful device for checking the temperature of the print as it is coming off the dryer belt or when being flashed. Simply point the gun at the imprint on the shirt and observe the reading. Holding down the button and you read the temperature as the shirt passes through the dryer. The one shown is available at Harbor Freight.com and is very affordable. While the “heat gun” does not give you the “final” word that a shirt is completely cured, it is very useful for measuring dryer temperature and for providing a reasonable assurance that you're shirts are most likely curing properly.  OPERATING TIPS FOR FLASH CURE UNITS The best small investment that you can make if you are starting out and all you can afford is a flash unit for all of your curing needs is to buy a digital countdown timer (available at Radio Shack or in the kitchen gadgets departments in many stores.) Just clip the timer on the unit and set it for the time you need to achieve a flash or full cure. To use the flash cure unit, adjust it so that hovers above the platen around 2 to 2 ¾ inches, simply swing the unit onto the platen when you want to flash cure. One extremely important caution. Some flash cure units do not come with an “on-off” light. This author recommends having some sort of light (like a bike flasher or similar) attached to the unit and “flashing,” every time the flash unit is in operation. When a flash cure unit is operating, it reaches a temperature of around 600 degrees. NEVER touch the heating element on the unit to “see if it's on.” This will result in a burn on your fingers that you will never forget. Further, never leave the unit “hovering” over the platen when it is on. The least that can happen is destruction of the platen, the worst being your building going up in flames! 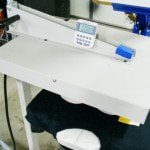 USING AN OVEN While I have read in other books and publications that some individuals (on what has to be the lowest budget imaginable!) have actually used a household oven to cure their prints, I would definitely discourage anyone from using this method. The number of perils that would be involved in using this method are too numerous to mention, so don't even consider it. Using a flash cure unit for it's intended purpose of “flash” curing (bringing the print to a partially cured state for a 2nd print stroke to achieve opacity) is ideal. With the right ink, you can “flash cure” a print in 7-10 seconds. However, to use a flash cure unit to completely cure the print will take around 35-45 seconds. While this is no big deal if you are only printing a few dozen shirts, it is less than ideal for larger orders. 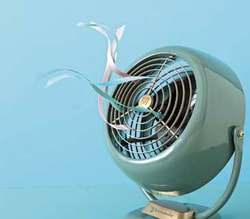 “SIZING” BURN-OFF Another thing that occurs when doing a complete cure with a flash unit is the amount of unpleasant fumes that are released into the work area from the shirt during the heating process. Most shirts are treated with “sizing” agents to increase the weight, crispness, and luster of the shirt. When heat from the flash unit is applied to the shirt, these sizing agents begin to “burn off,” creating a characteristic odor. When you first experience this you will most likely become alarmed thinking that the shirt is “burning up,” but it is only the sizing being eliminated from the shirt. The best way to control this problem is to keep a fan operating nearby to blow the sizing fumes away from the work area. The sizing burn-off problem will be most apparent when flashing fleece (sweatshirts, sweatpants), and certain colors of dark shirts, e.g. (forest green and royal blue shirts).  CURE TESTING As indicated previously, the ink deposit on the shirt must reach a temperature of 320 degrees to be completely cured. There are several methods that can be used to help with the determination of “full cure” and we'll explain each one below. THE “STRETCH” TEST “Stretching” the print on the shirt to see if it cracks has a limited value for checking for curing of the print. The idea behind this test is if the print “cracks” during stretching it is most likely under cured. It is suggested using this test for “spot checking” only and we recommend relying on more definitive testing methods, e.g.: wash testing (see below).  USING A HEAT GUN If you have ever used a “heat gun,” you know that they are powerful heaters that look similar to hair dryers. Heat guns can be used to dry (and strip) paint, thaw frozen pipes, “shrink” tubing, etc. They can also be used to cure plastisol ink in certain situations. One application where they may be used (but not recommended by this author) is for the curing of the print on ball caps. The problem with heat guns is that it is very difficult to control the curing with any degree of precision. Unless you place the heat gun on a “rest” to keep it in precisely the same spot each time and monitor the curing time exactly (with a timer), you run the risk of scorching or burning the cap. You also face the issue of incomplete curing with the use of heat gun. While the heat gun may work in a pinch, there are better curing solutions and it is not recommended. 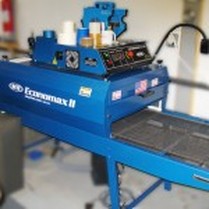 USING A TEXTILE DRYER The ideal curing solution is a textile dryer. Why it is not called a textile “curer” is a mystery, but “curing” the print on your shirts is effectively the function that it performs. As previously indicated, a textile dryer consists of a heated chamber in which the shirts are placed on a belt and pass under the heat element in the chamber for a finite amount of time determined by the belt speed setting. Once the dryer has properly set-up in your shop for optimum operating temperature (usually operating at around 900 to 950 degrees) and the ideal belt speed has been determined for complete curing, all you need to do for each print session is to allow the dryer to “warm-up” (run at operating temperature for 20-30 minutes) and you're ready to go. Using a textile dryer is as simple as putting your shirts on the belt and having a box at the other end to “catch” the shirts. The great thing about a dryer is that you can print as fast as it can take shirts! In large shops, that means thousands of shirts each hour are possible. Each dryer brand is slightly different in it's set-up and operation. The best recommendation for use of any particular dryer is to follow the manufacturer's instructions that came with it. 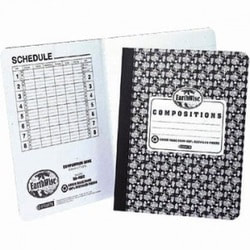 KEEP A PRODUCTION “SPECIFICATIONS” BOOK It's a good idea to keep a book in your shop to keep a record of dryer settings, temperature settings, notes about inks, and other important details that are specific to printing in your shop's operation. A production “specs.” book is nothing more than a “composition” type book that you can pick up in most office supply stores. Keeping a record of problems and their solutions is vital to your success as screen printer. Leaving things to memory is a poor way to operate your business. You'll be happy you kept those notes about that tough job you printed last year involving “special requirements” when that customer re-orders. PRECAUTIONS AND TIPS MOISTURE IN THE SHIRTS If your shirts are stored in a high humidity area, they will absorb moisture, especially 100% cotton fabrics (cotton will absorb more moisture than 50/50 blends) and this moisture can cause ink curing problems as plastisol ink will not adhere properly to a moist surface. A good idea if you print in high humidity conditions is to run your shirts through the dryer before printing them to eliminate the moisture from them. This is true with all garments, t-shirts, sweatshirts, etc. Another option to consider is to add a dehumidifier to your shop and/or air conditioning. GARMENT COLOR & CURING TIME As indicated above, the fabric type affects the curing time. So will the fabric color. Dark colored shirts will cure faster than white and light colored shirts. White, cotton shirts will take longer to cure than black (or other dark) 50/50 blend shirts. IS IT POSSIBLE TO “OVERCURE” THE PRINT? Yes. If the print is subjected to temperatures exceeding 350 degrees, the result will be overcured ink. Overcuring will result in a print that will crack and fade prematurely. Monitoring your dryer and flash curing times will keep this problem in check. 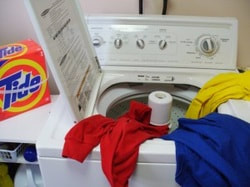 WASH TESTING The only guaranteed way to determine if your prints are curing properly is to do a “wash test.” It is a good habit to periodically wash a test shirt to see if your dryer is working as expected. It is also a good idea to wash test a shirt for any “high value” order, large quantity orders, or if the order is for any type of garment or product that you may have concerns for curing issues, e.g.: metallic, glitter inks, etc. To do a wash test, simply place a printed shirt in with a load of your regular wash. This is exactly what your customer will do at home. If the print stays on (or has no noticeable defects) after the shirt is washed, it has passed the wash test–it’s that simple. What can you tell from the wash test? If the print was only partially cured, some or most of the print would have “washed off.” If the print was severely undercured, the print will most likely be completely gone. If this problem does occur, go back to your shop and find the source of the problem before beginning any further production.  ADEQUATE DRYER & FLASH WARM-UP Always let your dryer and flash cure units warm up prior to beginning production. Even if your dryer has a temperature read-out, it is still a good idea to let the unit warm up. A 15-20 minute warm-up is usually sufficient. However, if in doubt, it's not a bad idea to check the temperature with a heat gun.
0 Comments
Your comment will be posted after it is approved.
Leave a Reply. |
AuthorASPA Staff ArchivesCategories
All
|
 RSS Feed