

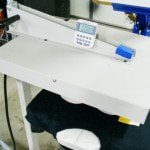
 ALL ABOUT FLASH CURING A SCREEN PRINT If you are starting up your shop on a small budget, you may only be able to afford a flash cure unit to completely cure the prints on your shirts. It is possible to start and operate a small T-Shirt screen printing shop with just a flash cure unit. In fact, a textile dryer (the ideal method for curing) is essentially nothing more than a belt driven chamber that usually contains the same type of heating elements that you find in a flash cure unit. Using a flash cure unit for it's intended purpose of “flash” curing (bringing the print to a partially cured state for a 2nd print stroke to achieve opacity) is ideal. With the right ink, you can “flash cure” a print in 7-10 seconds. However, to use a flash cure unit to completely cure the print will take around 35-45 seconds. While this is no big deal if you are only printing a few dozen shirts, it is less than ideal for larger orders. “SIZING” BURN-OFF Another thing that occurs when doing a complete cure with a flash unit is the amount of unpleasant fumes that are released into the work area from the shirt during the heating process. Most shirts are treated with “sizing” agents to increase the weight, crispness, and luster of the shirt. When heat from the flash unit is applied to the shirt, these sizing agents begin to “burn off,” creating a characteristic odor. When you first experience this you will most likely become alarmed thinking that the shirt is “burning up,” but it is only the sizing being eliminated from the shirt. The best way to control this problem is to keep a fan operating nearby to blow the sizing fumes away from the work area. The sizing burn-off problem will be most apparent when flashing fleece (sweatshirts, sweatpants), and certain colors of dark shirts, e.g. (forest green and royal blue shirts). OPERATING TIPS FOR FLASH CURE UNITS The best small investment that you can make if you are starting out and all you can afford is a flash unit for all of your curing needs is to buy a digital countdown timer (available at Radio Shack or in the kitchen gadgets departments in many stores.) Just clip the timer on the unit and set it for the time you need to achieve a flash or full cure. To use the flash cure unit, adjust it so that hovers above the platen around 2 to 2 ¾ inches, simply swing the unit onto the platen when you want to flash cure. One extremely important caution. Some flash cure units do not come with an “on-off” light. It is recommended that you have some sort of light (like a bike flasher or similar) attached to the unit and “flashing,” every time the flash unit is in operation.When a flash cure unit is operating, it reaches a temperature of around 600 degrees. NEVER touch the heating element on the unit to “see if it's on.” This will result in a burn on your fingers that you will never forget. Further, never leave the unit “hovering” over the platen when it is on. The least that can happen is destruction of the platen, the worst being your building going up in flames! PRINT-FLASH-PRINT TECHNIQUE (PFP) When printing on dark shirts more often than not you will need to print the ink twice to achieve the desired opacity of the print. Printing the ink twice covers the fibers in the shirt so you do not see the color of the shirt showing through. To achieve complete opacity of the print, you would use the Print-Flash-Print technique (PFP). To use the PFP technique, you print the ink color, flash cure to “dry” the surface of the print, then apply another print stroke. The purpose of the flash curing is to dry the surface of the ink, most often white ink, so that the other colors in the image can be printed on top. Almost always you will have to print and flash the white ink twice to achieve the opacity necessary for an acceptable print. Flash curing times vary depending on the type and color of ink that you are using. Flash curing times for white ink is typically under 10 seconds. When flash curing colored inks you may need to flash the print 20 seconds or more. Often, that flash print will become very hot and it may be necessary to use either a cool down station or a “chiller plate” to cool the print before applying your top coat. 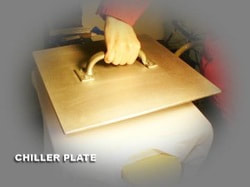 USING A “COOL-DOWN” PLATE AND WHY Flash curing can cause a significant heat buildup on both the garment and the platen of the printing press. If you attempt to print other colors on top of a hot underbase, a condition will develop in which the ink will actually dry in the screens of the overprint colors. What is actually happening is the ink is partially curing in the screen and the mesh has become clogged, preventing any ink from flowing through the stencil. One simple way to avoid this problem is the use of a “cool down” or “chiller plate.” Simply press the plate on the flash cured garment for 5-10 seconds. The chiller plate will absorb the heat from the shirt allowing you to print the rest of the colors without problems. You can make a low cost “chiller plate” using a round or rectangular tin cookie sheet and attaching a handle to it.
0 Comments
Your comment will be posted after it is approved.
Leave a Reply. |
AuthorASPA Staff ArchivesCategories
All
|
 RSS Feed